View and manage your vendor bills
Find, filter and organize every vendor bill in the Vendor Bills list, and restore or move bills when you need to.
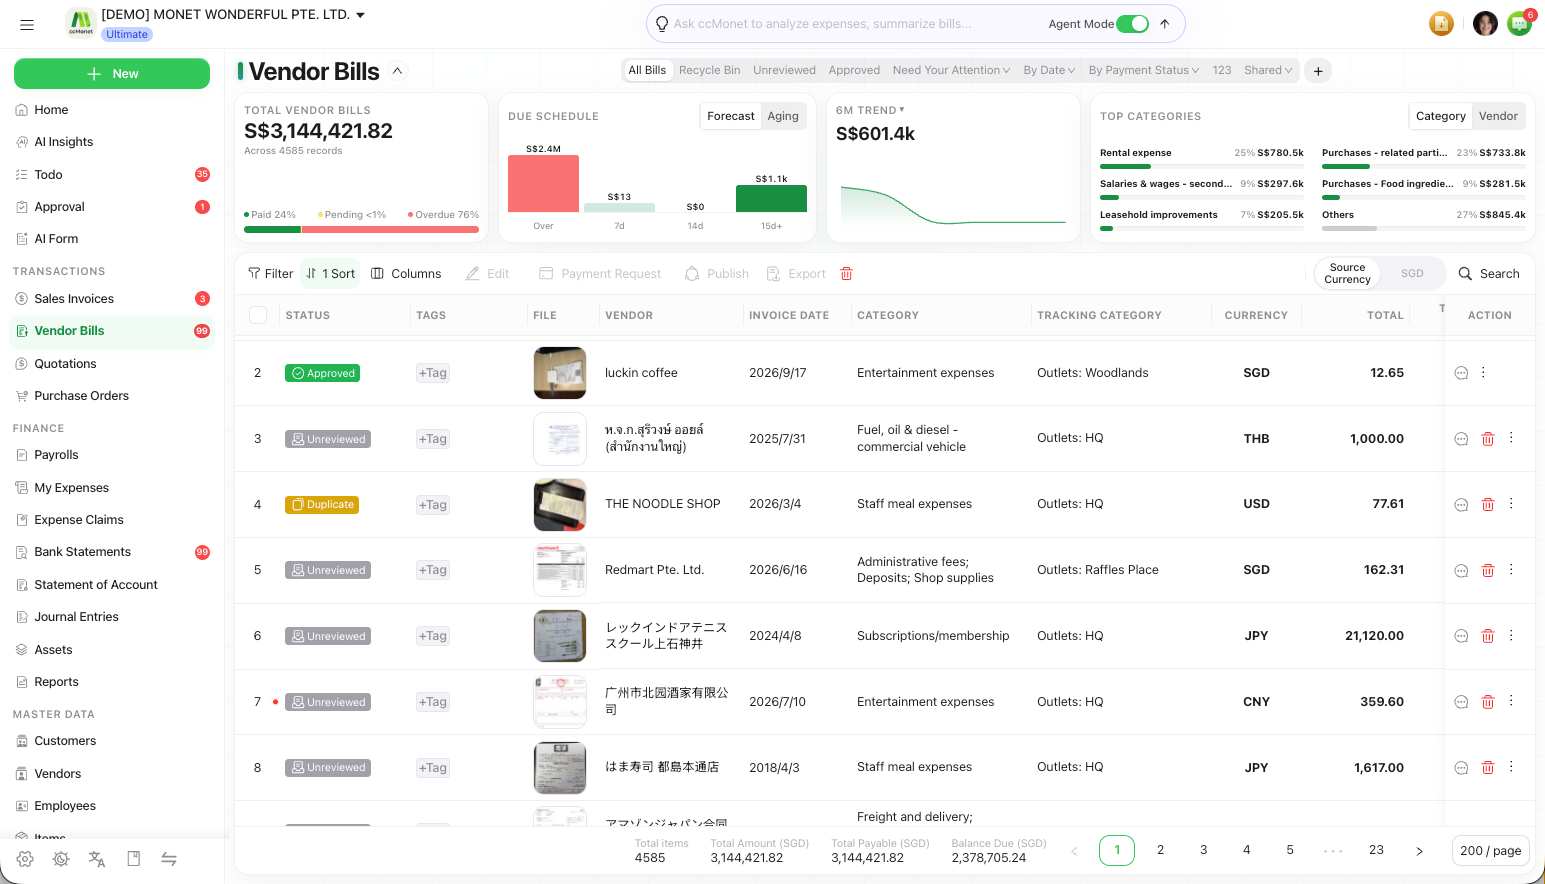
Vendor Bills is the central list of everything you owe — every bill you or the AI has captured. From here you see each bill's status, category, amount and due date, filter and search the list, and open any bill to work on it.
Open it from the left sidebar under Transactions → Vendor Bills.
What the list shows
Each row is one bill. The columns give you the essentials at a glance:
| Column | What it tells you |
|---|---|
| Vendor / Payee | Who the bill is from |
| Status | Whether the bill has been recognized, approved, or is in an approval flow |
| Category | The account category assigned to the bill or its lines |
| Balance Due | What's still owed |
| Payment status | Unpaid, partially paid or paid |
| Due date | When payment is due |
Vendor Bills uses the same table component as Sales Invoices, switched to show bills. Some actions differ between the two — this page describes the bill side.
Find the bills you need
Search
Type a vendor name, amount or reference into the search box to narrow the list.
Filter
Filter by fields such as payment status, category, or date to focus on, for example, unpaid or overdue bills.
Read the trend
Expand the insights panel above the list — the chevron beside the Vendor Bills title — to see totals, a due schedule, a spend trend over time, and your top vendors and top categories.
Act on a bill
- Open a bill — select a row to review and edit it.
- Create a new bill — add one manually, or upload a file for AI capture.
- Select several — tick rows to run batch operations or publish them.
- Move a bill — reclassify it with Move to Sales Invoices, Move to SOA or Move to Document, or send it to another company with Move to Another Organization (below).
- Delete a bill — remove it to the Recycle Bin, where it can be restored.
Restore a deleted bill
Deleting a bill doesn't remove it permanently — it goes to the Recycle Bin.
Open the Recycle Bin
From the Vendor Bills list, open the Recycle Bin.
Restore the bill
Find the deleted bill and choose Restore. It returns to your Vendor Bills list with its data intact.
Move a bill to another organization
If a bill landed in the wrong company, you can move it.
Select the bill
Tick the bill (or bills) in the list.
Choose the destination organization
Open the move option and pick the target organization. The bill and its document move to that organization's Vendor Bills.
Moving a bill takes it out of the current organization's books. Make sure you've picked the right destination before confirming.